You can change how any of the text or values appear on a document. For example, you may want to change the colour and font used for your company name or the whole document to match your company branding, or you may want to underline report totals to make them stand out.
Within a document, You can change the appearance for:
-
The whole document.
-
For individual items - this could be a data field, heading, or piece of text.
-
For all items that use a preset Style - these are a set of characteristics that are applied to a number of items. When you change the style, you change the appearance if all items that use that style.
Note: Styles are specific to individual documents. If you modify a style in one document, it does not affect other documents that use the same style.
Watch a video
Change the text style in Report Designer (video)
How to locate the report or document
Open: ![]() Tools > Run Sage Report Designer
Tools > Run Sage Report Designer
-
Go to File Explorer section.
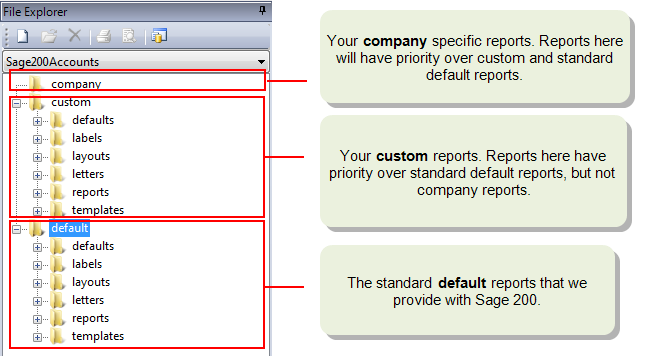
The default reports are all stored under the Defaults folder by type of report and module such as nominal, purchases etc:
If you've previously amended the report or document, it will be saved in the Custom or Company folder.
Report types-
Labels - prints labels for stock items and suppliers.
-
Layouts - used for printing invoices and credit notes.
-
Letters - for debtor letters to send to customers.
-
Reports - all reports
-
How to set fonts and colours for individual items
- Select the item you want to change.
-
Change the font, size, colour etc from the toolbar

-
Alternatively, to use the Properties pane:
-
Select View > Properties.
-
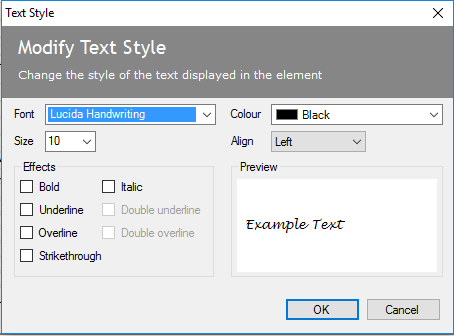
Select Text Style and click the ... button (
 ).
). -
Set the required style.
-
-
You'll be asked if you want to apply the change to all items that use the same style. To just apply the changes to a single item, click No.
How to set fonts and colours for the whole document
-
Select Edit > Select All.
-
Choose the font, size, colour etc from the toolbar.
Tip: Preview the document to check that it's displaying correctly (View > Preview).
How to change a preset style
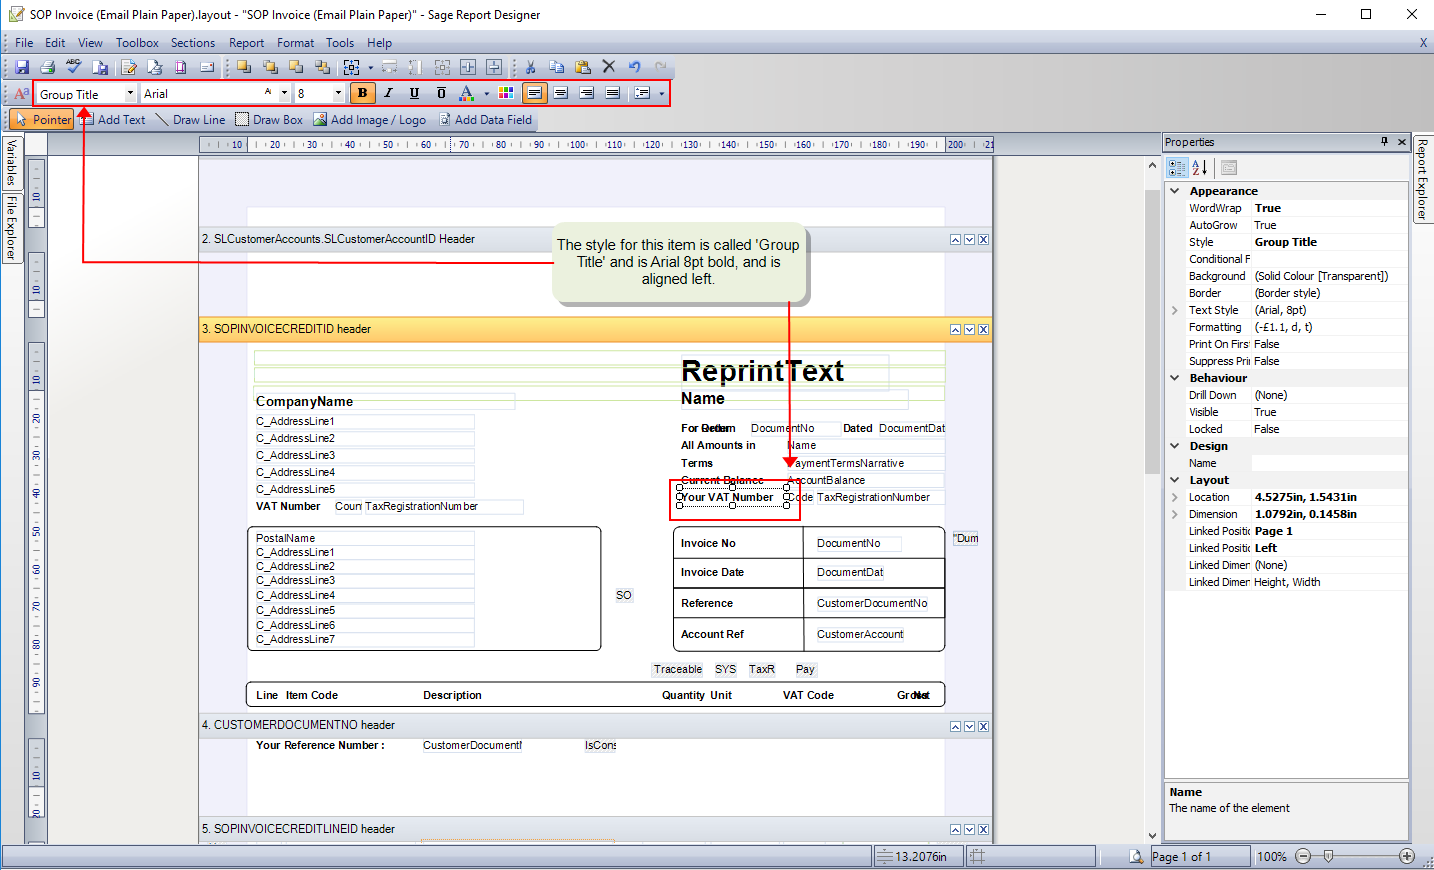
All documents have some preset styles. These are typically applied to similar elements in the document to make sure it looks consistent. For example, labels for data fields may have a style called Group Title, while the data fields have a style of Group Field. You can modify the styles that come with Report Designer or create your own.
-
Select the style from the drop down list on the toolbar.
If you're not sure what a style is called, select an item that uses it, and the style name is shown on the toolbar. Once you've made the required changes, you'll be asked whether to you want to apply them to all items using that style.
-
Change the font, size, colour etc from the toolbar.

Tip: Preview the document to check that it's displaying correctly (View > Preview).
How to use a custom colour
- Select the item, you want to change.
-
From the Properties pane, select Text Style and click
. -
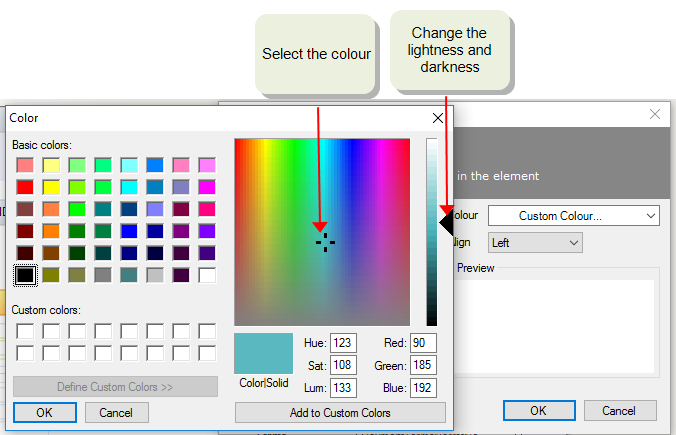
Choose Custom colour from the bottom of the Colour drop-down list.
-
Select the colour you required from the colour matrix. Change the lightness and darkness by dragging the arrow up and down the right of the window.
Alternatively enter RGB specification for the colour, if known.
-
Click Add to Custom Colors, the click OK.
Tip: Preview the document to check that it's displaying correctly (View > Preview).
Where to save the amended report or document
When you save a customised report or document, make sure to save it in a new folder. This is to make sure that the original isn't lost.
If you have more than one
-
Keep the file name the same as the default file name for the report or document.
- Save your report in the custom folder using same path as the original:
- custom/reports/<module name >
- custom/layouts
- custom/letters
- custom/labels
For example, if you add a logo to the SOP Invoice (Single Plain paper) layout , the filename will look like this: custom/layouts /SOP Invoice (Single Plain Paper).layout.
-
Keep the file name the same as the default file name for the report.
- Save your report in the same folder as the original but under the company folder and add the
- <company name>/reports/<module name >/filename
- <company name>/layouts/filename
- <company name>/letters/filename
- <company name>/labels/filename
For example, if you add a logo to the SOP Invoice (Single Plain paper) layout for a company called Test, save it under company and the filename will look like this :Test/layouts/SOP Invoice (Single Plain Paper).layout
When you generate a report or document Sage 200 first looks for the version in the Company folder, then the Custom folder, and if it does not find one it uses the 'out of the box' version. For each report, it will check in a specific folder for a specific filename.